Unlock the full potential of your Nest outdoor camera with a seamless reset process. This guide delves into the step-by-step procedure to reset your Nest outdoor camera, ensuring optimal functionality. Whether troubleshooting issues or preparing for a new setup, our comprehensive instructions guarantee a hassle-free experience. By mastering this essential skill, stay connected and secure with your Nest outdoor camera. Follow our expert guidance to navigate the reset process effortlessly, empowering you to make the most of this advanced surveillance technology. Elevate your home security with precision and confidence as we guide you through the intricacies of resetting your Nest outdoor camera.
What is a Nest outdoor camera?
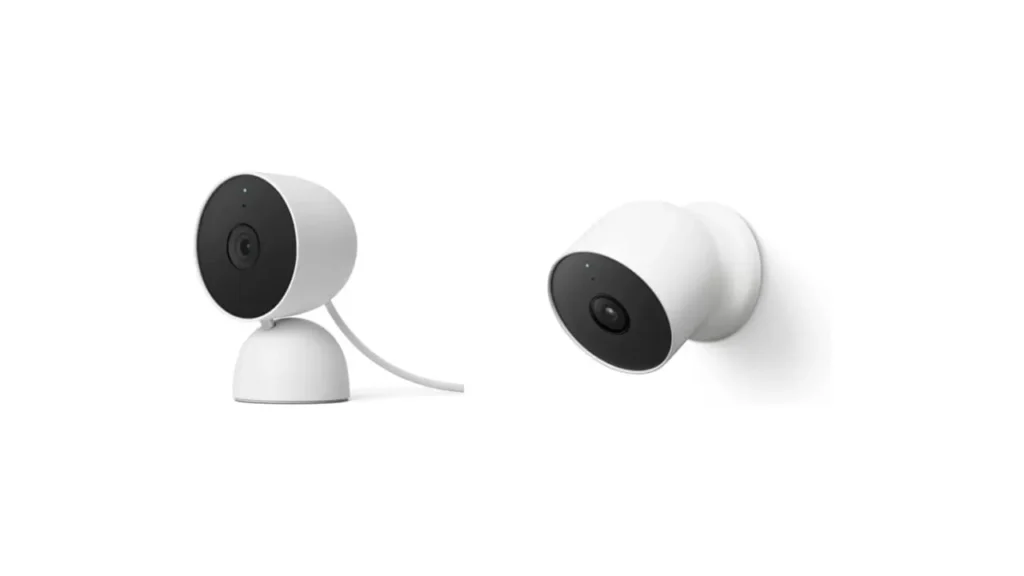
The Nest Outdoor Camera is a pinnacle in modern home security, seamlessly blending cutting-edge technology with user-friendly functionality. Designed by Nest, a leader in smart home solutions, this outdoor camera boasts high-definition video capabilities, advanced motion detection, and 24/7 live streaming. With weatherproof construction, it withstands the elements to ensure constant vigilance over your property. The Nest Outdoor Camera integrates effortlessly into the Nest ecosystem, allowing centralized control through the Nest app. Its intelligent features, including facial recognition and customizable activity zones, elevate home surveillance. Stay connected and secure with the Nest Outdoor Camera, a sophisticated solution that provides peace of mind through unparalleled performance and ease of use.
How to Reset Your Nest Outdoor Camera: A Step-by-Step Guide
Step 1: Understand the Reset Process
Understand the Nest Outdoor Camera reset process:
- Locate the reset button, hold it for 10 seconds until the LEDs flash, and release.
- Remember, this erases settings and disconnects from Wi-Fi.
- Reconfigure the camera to restore functionality.
- Knowing this process empowers you to troubleshoot camera issues effectively.
Step 2: Power Off the Camera
Before initiating the reset process, powering off your Nest Camera is crucial. By following this step, you ensure a safe and effective reset.
To power off the camera, locate the power adapter connected to it. Please disconnect the power adapter from the camera or unplug it from the power source. This action will cut off the power supply to the camera, ensuring that it is entirely powered down.
Powering off the camera is essential to prevent electrical interference or potential damage during resetting. It lets the camera reset effectively and clears any temporary data or configurations.
Take a moment to ensure the camera is entirely powered off before proceeding to the next step. Verifying this will help guarantee the reset’s success and prepare the camera for the subsequent steps in the reset process.
Step 3: Press and Hold the Reset Button
To reset your Nest Outdoor Camera, ensure it is powered off. Using a paper clip or pin, locate the small reset button near the power cord and press/hold it for approximately 10 seconds. The camera’s LED indicators will flash, confirming the reset. This action initiates the restoration to factory settings, resolving any issues you may be experiencing with the camera.
Step 4: Observe the LED Indicators
Observe the LED indicators while holding the reset button on your Nest Outdoor Camera. The flashing lights indicate that the camera has received the reset command and is resetting itself. Each camera model has a unique LED sequence, so consult the user manual for specific details. Patience is essential as you wait for the LED indicators to finish their sequence, confirming the progress of the reset process.
Step 5: Release the Reset Button
After confirming the LED indicators’ completion of the flashing sequence, release the reset button on your Nest Outdoor Camera. This allows the camera to proceed with the reboot and restoration of factory settings. Be patient and avoid interruptions as the camera completes the reset. Once the reboot is finished, you can proceed with reconfiguring and setting up the camera.
Step 6: Reconfigure the Camera
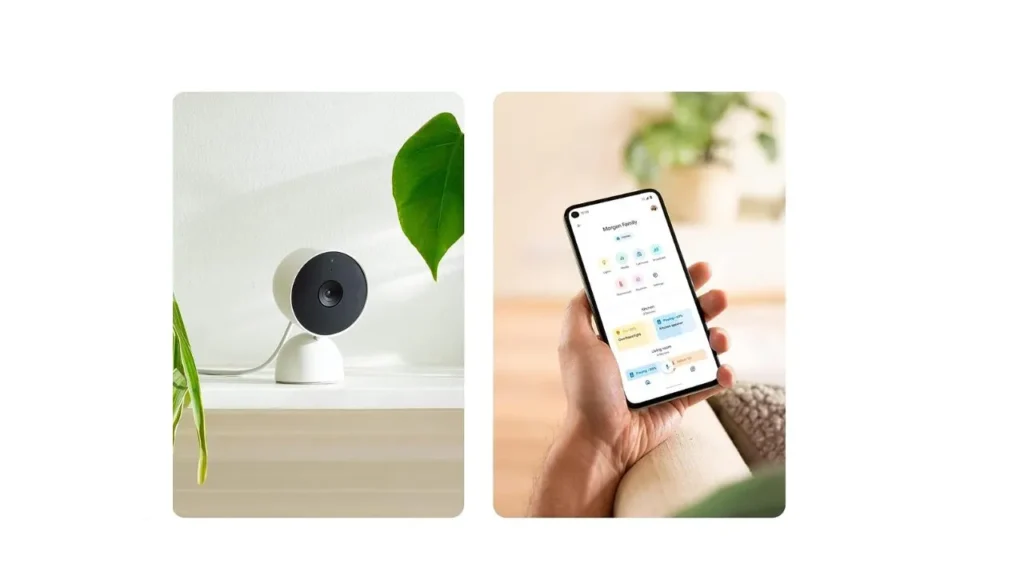
After the Nest Outdoor Camera has completed the reset and reboot, the next step is reconfiguring the camera. Reconfiguring involves connecting the camera to your Wi-Fi network and setting it up again.
To reconfigure the camera, follow these steps:
- Open the Nest app on your smartphone or tablet. If you don’t have the app installed, download it from the App Store or Google Play Store and sign in with your Nest account.
- Tap on the “Add” or “Set up new device” option in the app. This will initiate the camera setup process.
- Follow the on-screen instructions provided by the Nest app. These instructions will guide you through the steps to connect the camera to your Wi-Fi network. Make sure you have your network name (SSID) and password ready.
Once the camera is connected to your Wi-Fi network, the app will prompt you to name the camera and set preferences such as motion detection sensitivity, notifications, and other settings. Customize these options according to your preferences.
Step 7: Test the Camera
After reconfiguring your Nest Outdoor Camera, it is crucial to test its functionality to ensure it works correctly. Performing a test will allow you to verify that the camera is streaming live video, detecting motion, and functioning as expected. Here are the steps to test the camera:
Launch the Nest app on your smartphone or tablet.
- Locate the camera you have just reconfigured in the app’s device list. Tap on it to access the camera’s live feed.
- Observe the live video feed from the camera and ensure it is clear and displays the desired area.
- Test the camera’s motion detection by moving in front of it. You should see the camera detect and capture the motion, and the app may send you a notification or alert about the detected activity.
- Check if the camera’s other features, such as two-way audio or night vision, function correctly. Engage in a conversation using the two-way audio or test the night vision capabilities in a low-light environment.
- Verify that they work as intended if you have enabled additional features or settings, such as video recording or activity zones.
By conducting a comprehensive test, you can confirm that your Nest Outdoor Camera is operating correctly after resetting and reconfiguring. If you encounter any issues during the trial or notice any unexpected behavior, consult the Nest app’s troubleshooting resources or contact Nest support for further assistance.
Step 8: Customize Settings
Once you have tested the basic functionality of your reconfigured Nest Outdoor Camera, you can customize its settings according to your preferences. Customizing the settings allows you to tailor the camera’s behavior, notifications, and other features to meet your needs. Here are the steps to customize the camera settings:
- Open the Nest app on your smartphone or tablet.
- Locate the camera you want to customize in the app’s device list. Tap on it to access the camera’s settings.
- Explore the various settings options available for the camera. These may include:
Video Quality: Adjust the resolution and quality of the camera’s video feed.
Motion Detection: Fine-tune the sensitivity and activity zones for motion detection.
Notifications: Configure when and how you receive notifications for motion events or other camera activities.
Recording Options: Set up continuous video recording (if available) or configure event-triggered recording.
Familiar Faces: Enable facial recognition to receive specific alerts for familiar faces.
Privacy Mode: Define specific times or zones to turn off video and audio recording for increased privacy.
Integrations: Connect the camera to smart home devices or services like Google Assistant or third-party platforms.
Customize each setting according to your preferences. Make adjustments based on your desired security, privacy, and convenience level.
Save your customized settings within the Nest app. The app will sync the scenes with your Nest Outdoor Camera, applying them correctly.
By customizing the settings, you can optimize your Nest Outdoor Camera’s performance and tailor it to your requirements. Reviewing and adjusting these settings helps you maintain an ideal configuration over time.
Read More:
How Does A Camera Stabilizer Work: A Detailed Beginner’s Guide
How To Turn Off The Ring Camera
Conclusion
Mastering the Nest Outdoor Camera reset ensures optimal functionality. Understanding the step-by-step guide, including locating the reset button, powering off, and observing LED indicators, is crucial. The subsequent steps involve releasing the reset button, reconfiguring through the Nest app, testing functionality, and customizing settings. This guide empowers users to navigate resetting their Nest Outdoor Camera with ease, enhancing home security confidently. The Nest Outdoor Camera, a pinnacle in modern home security, blends cutting-edge technology with user-friendly features. Designed by Nest, it offers high-definition video, advanced motion detection, and 24/7 live streaming. Stay connected and secure with unparalleled performance.