In the realm of modern surveillance, maintaining the optimal functionality of your Arlo Camera is paramount. Whether prompted by troubleshooting needs or a desire to start anew, the process of resetting your Arlo Camera demands precision and a step-by-step approach. In this guide, we’ll delve into the intricacies of resetting your Arlo Camera, ensuring that you navigate the procedure seamlessly. So, let’s embark on the journey to reset your Arlo Camera and restore it to its default settings.
What Is an Arlo Camera
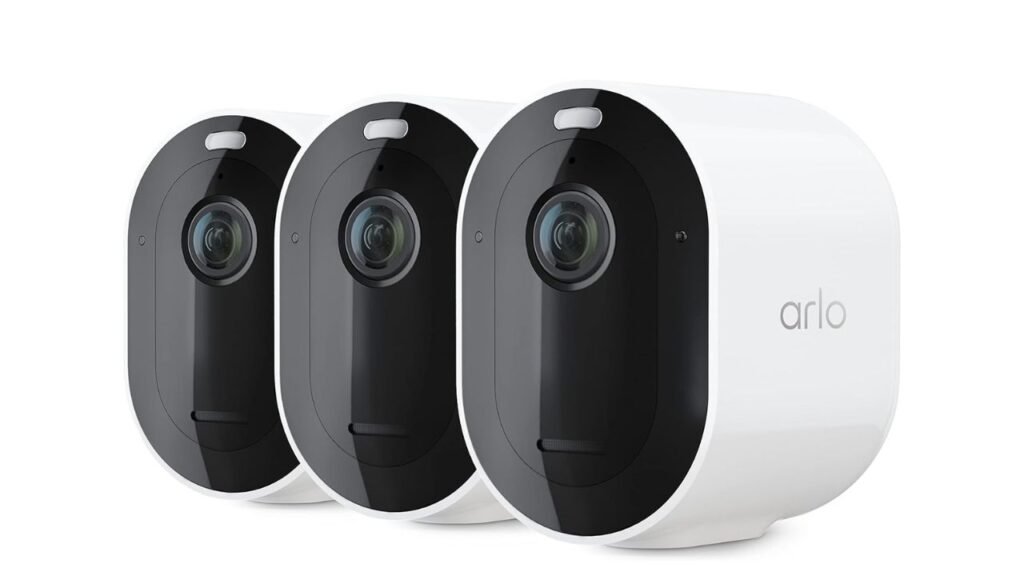
The Arlo Camera, an epitome of cutting-edge technology in the domain of home security, redefines surveillance with its sleek design and advanced features. Developed by Arlo Technologies, this wireless marvel introduces a new era of monitoring, offering high-definition video quality, motion detection, and cloud storage capabilities. The Arlo Camera stands as a testament to innovation and user-friendly design, providing a seamless and reliable solution for modern home security needs.
10 Steps To Reset Arlo Camera
Resetting your Arlo Camera is a straightforward process that ensures optimal performance and functionality. Follow these five simple steps to reset your Arlo Camera effectively:
Step 1: Access Arlo Settings
To initiate the reset process for your Arlo Camera, begin by accessing the Arlo settings on your preferred device—whether it’s a smartphone, tablet, or computer. Locate the Arlo app or web portal and navigate to the settings section, often represented by a gear icon.
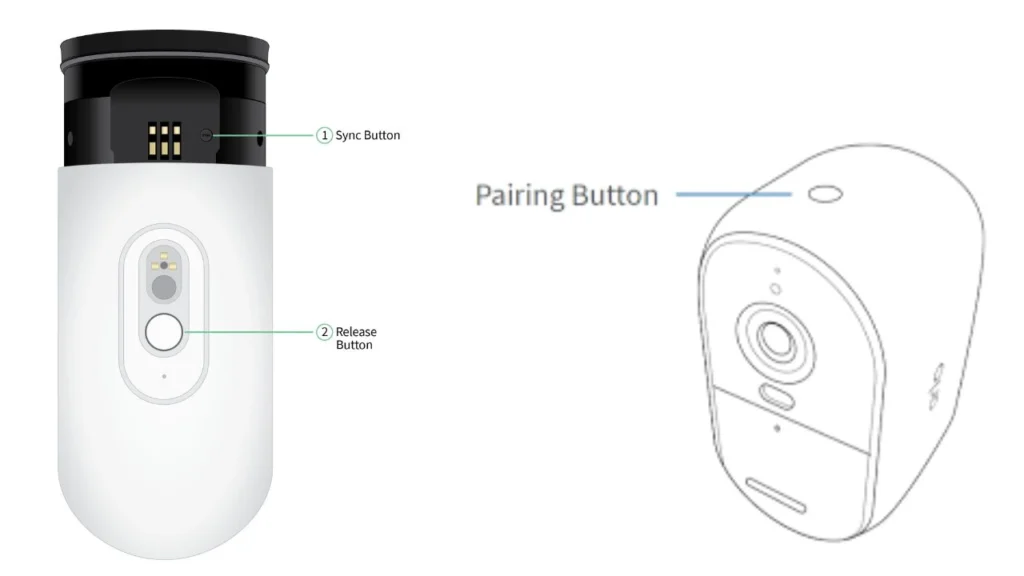
Step 2: Identify Your Camera
Within the settings, find the section labeled “My Devices” to view a list of connected Arlo Security cameras. Identify and select the specific camera you intend to reset. This ensures precision in the reset process and avoids unintended actions on other devices.
Step 3: Navigate to Device Settings
Once you’ve chosen the targeted Arlo Security Camera, delve into its specific settings. Look for the “Device Settings” option, which typically holds key functionalities related to the camera’s operation.
Step 4: Initiate the Reset
Within the device settings, locate the “Reset” or “Restart” option. Click or tap on this option to initiate the reset process. Confirm your intention to reset the camera when prompted. This step may require you to enter your login credentials for added security.
Step 5: Confirm and Test
After confirming the reset, patiently wait for the process to complete. Once done, re-establish the connection between your Arlo Camera and the app or web portal. Take a moment to test the camera’s functionality to ensure that the reset was successful. This step-by-step approach ensures a seamless and effective reset of your Security Camera, maintaining the reliability of your home security system.
Read More: When Were Security Cameras Invented? Step-by-Step Guide
How To Set Up Arlo Camera
Setting up your Arlo Camera is a streamlined process, ensuring that your home security system is up and running with precision. Follow these simple steps to configure your Arlo Camera seamlessly:
Unbox and Power Up
Start by unboxing your Arlo Camera and its components. Connect the camera to a power source using the provided cable and adapter. Ensure a stable power supply to kickstart the setup process.
Download the Arlo App
Head to your device’s app store and download the Arlo app. Once installed, open the app and sign in with your Arlo account or create a new one if you’re a first-time user.
Add Your Camera
In the Arlo app, navigate to the “Add Device” section. Follow the on-screen instructions to select your Arlo Camera model and connect it to the app. This step establishes the crucial link between your camera and the application.
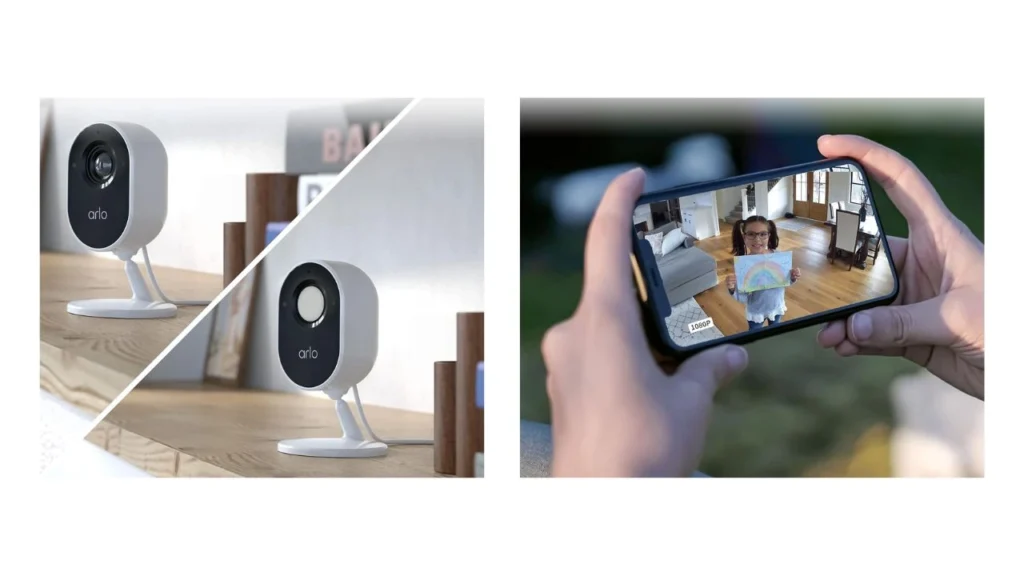
Position Your Camera
Choose the optimal placement for your Arlo Camera. Consider factors such as coverage area, angle, and potential obstructions. Mount the camera securely, either indoors or outdoors, using the provided mounts or accessories.
Customize Settings
Fine-tune your Arlo Camera settings to align with your preferences. Adjust motion sensitivity, notification preferences, and recording modes based on your security needs. This step ensures that your Camera operates in a manner tailored to your specific requirements.
How To Charge Arlo Camera
Charging your Arlo Camera is a straightforward process, ensuring continuous functionality for your home security system. Follow these simple steps to charge your Arlo Camera efficiently:
Remove the Camera
Start by detaching the Arlo Camera from its mount or location. This ensures easy access to the camera’s charging port.
Locate the Charging Port
Identify the charging port on your Arlo Camera. It is usually located at the back or bottom of the device. Ensure the camera is positioned in a way that allows easy connection to the charging cable.
Use the Provided Cable
Arlo Cameras typically come with a specific charging cable. Utilize this cable to connect the camera to a power source. You can use a wall adapter or a computer USB port for charging.
Monitor the Charging Status
Once connected, keep an eye on the camera’s LED indicator. A solid light indicates that the camera is charging, while a blinking light may signal an issue. Allow sufficient time for a full charge.
Reattach the Camera
After the charging process is complete, reattach the Arlo Camera to its mount or desired location. Ensure the camera is securely in place for optimal performance.
By following these steps, you’ll maintain a charged and operational Arlo Camera, contributing to the consistent and reliable surveillance of your home.
Are Arlo Cameras Any Good?
In the ever-evolving realm of home security, Arlo cameras have emerged as a beacon of excellence, redefining the standards for intelligent surveillance. Let’s delve into what makes Arlo cameras stand out and why they are a commendable choice for safeguarding your home.
Cutting-Edge Technology
Arlo cameras boast state-of-the-art technology that sets them apart from the crowd. With features like 4K Ultra HD resolution, advanced motion detection, and night vision capabilities, Arlo ensures that every detail is captured with utmost clarity, day or night.
Wire-Free Convenience
Bid farewell to the hassle of cumbersome wires and intricate installations. Arlo cameras are designed with a wireless philosophy, allowing for easy setup and flexible placement. This not only enhances the aesthetics of your home but also makes it a breeze to install the cameras exactly where you need them.
Seamless Integration
Arlo understands the importance of a unified smart home ecosystem. These cameras seamlessly integrate with popular platforms like Google Assistant and Amazon Alexa, offering you the convenience of controlling and monitoring your security system with simple voice commands.
Cloud Storage and Smart Subscription Plans
Arlo’s commitment to user convenience extends to its cloud storage options. Enjoy peace of mind with secure cloud storage for your footage. Additionally, Arlo offers innovative subscription plans that cater to your specific needs, ensuring you only pay for the features that matter most to you.
Weather-Resistant Durability:
Whether it’s rain or shine, Arlo cameras are up to the challenge. Engineered with weather-resistant designs, these cameras can withstand the elements, providing reliable surveillance in various environmental conditions.
User-Friendly Mobile App:
Control at your fingertips! The Arlo mobile app empowers you to monitor your home from anywhere, offering real-time access to your camera feeds. Receive instant notifications, customize settings, and stay connected with your home security at all times.
Related: Keilini Light Bulb Security Camera: Latest Guide in 2024
Conclusion
In conclusion, the process of resetting your Camera is a crucial aspect of maintaining its optimal functionality in the ever-evolving realm of modern surveillance. This guide has provided a detailed and step-by-step approach to ensure a seamless reset, emphasizing precision and user-friendly navigation. The Arlo Camera, a pinnacle of cutting-edge technology in home security, stands as a testament to innovation with its sleek design and advanced features.
Whether you’re setting up your Security Camera for the first time or charging it for continuous functionality, the provided steps offer a streamlined and efficient process. Arlo cameras excel in the realm of intelligent surveillance, boasting cutting-edge technology, wire-free convenience, seamless integration, cloud storage options, weather-resistant durability, and a user-friendly mobile app. In essence, Arlo cameras are a commendable choice for safeguarding your home, providing excellence in both performance and user experience. Embrace the world of Arlo for reliable and advanced home security solutions.